How to Prevent AC Repair

A well-functioning AC unit is essential to home comfort. However, it is not immune to breakdowns. HVAC maintenance is essential to preventing breakdowns and minimizing their impact.

If your AC system isn’t producing cold air or making loud noises, there could be an issue with the cooling cycle or a faulty component. The good news is, many of these issues can be resolved with simple AC Repair. Contact Heating And Cooling Van Nuys now!

Dirty evaporator coils can cause a variety of AC problems, including low cooling power, uneven heating in homes and offices, and increased energy bills. Fortunately, this is a problem that can easily be prevented with routine cleanings and proper installation practices.

The evaporator coil in your air conditioning unit is responsible for dissipating heat, so it’s no surprise that this part of the system is susceptible to clogs and other issues. The simplest reason for this is simply a build-up of dust and dirt, but there are other potential causes as well. These include poor installation and lack of regular maintenance.

When dust and dirt accumulate on the evaporator coil, they create an insulating layer that inhibits heat transfer. The cooling process is hindered, and the system will have to work harder and longer to achieve the same results. This is a sure sign that the evaporator coil needs to be cleaned.

In addition to reducing efficiency, dirty coils can also lead to an increase in moisture inside your air conditioner. This moisture serves as a breeding ground for mold, mildew, and other microorganisms that affect indoor air quality. It can also clog the coil fins, further impeding heat transfer and lowering cooling efficiency.

If you notice any of these symptoms, the first thing to do is turn off your AC and unplug it from the power source. Next, use a can of compressed air to blow away any large particles of debris from the coil surface. You can also clean the fins with a soft brush to remove any built-up dirt and grime. Just be careful not to damage the delicate coil fins with too much pressure.

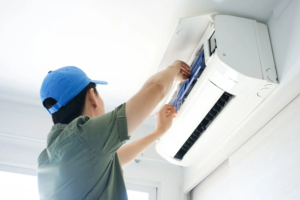
If you don’t feel comfortable opening up your AC unit, you can call a professional. An experienced HVAC technician can inspect the unit and determine if the evaporator coil is dirty. They can then perform the necessary cleaning and maintenance to ensure your air is clean and conditioned. They may also recommend replacing the air filter to help prevent future build-up, as well as checking the refrigerant level to make sure it’s at the correct level.

Failed Contactor

There’s a lot of electrical circuitry in an air conditioning system, and even the smallest failure of a single component can cause an entire system to fail. There are some components that are more likely to experience problems than others, and two of these are the capacitor and contactor – an electrical tag team that work closely together to power up your AC.

The contactor is the component that controls the flow of electricity to the compressor and condenser fan motor in an air conditioning unit. The contactor can get stuck in either the open or closed position, resulting in your AC running nonstop (even when your thermostat is set to “off”).

If you suspect that your contactor has failed, you should start by turning off the power to your AC. This should be done at both the thermostat and breaker box to prevent shock risks.

Next, remove the cover from your outdoor unit to expose the wiring connections. You should find a small, black rectangle that looks like a drawbridge that opens and closes to make or break power supply lines. The contacts within the contactor are connected by metal strips that allow the current to pass through – these can wear down or become welds over time, causing the contacts to fail.

A failing contactor can also produce a rapid clicking noise as it rapidly tries to engage and disengage. This can also lead to visible signs of overheating or a burnt smell, alerting you that it’s time for a replacement.

The arcing that occurs when the contactor fails to engage or disengage causes heat to melt cable insulation and even weld your contactor’s metal contacts together. As a result, your contactor might be visibly damaged, or you may notice that the plastic coating has melted away. In addition to these visual indicators, your contactor might also sound distorted or buzzy when it is defective. These sounds are due to the failure of your AC contactor’s contacts, and they can cause the entire unit to fail. You should call a professional immediately to replace your AC contactor if you hear these sounds.

Failed Blower Motor

Your blower motor is an essential part of your air conditioning system, circulating heated or cooled air throughout the entire home. If it is failing, your system won’t operate as intended. A common sign of a failing blower motor is weak airflow from your home’s vents. This may indicate that the motor is clogged, needs a new capacitor, or is nearing the end of its life. A licensed HVAC technician can determine if this is the case and recommend an appropriate repair solution.

Unusual Noises

Another sign that your blower motor is beginning to fail is unusual sounds that it makes while running. You might hear squealing or rattling noises, which could indicate that the bearings are getting worn out and need to be replaced. A loud banging sound may also occur if something inside the blower is loose or broken. In any event, these sounds should be investigated as soon as possible to avoid a more serious problem in the future.

Increasing Energy Bills

If your electric bills are suddenly higher than usual, it’s possible that the blower motor is struggling to circulate enough air and overheating. The motor uses a lot of power to function, so overheating can cause it to shut down until the motor cools down. This can be very expensive, especially if the motor is at the end of its life and isn’t functioning well.

Before attempting any repairs on your blower motor, it’s important to turn off the power supply to the unit to prevent injury or damage. The best way to do this is to find the red reset button, which is usually located on the back of the blower motor and will pop out if you push it. Once you’ve done this, you can remove the cover and let the blower motor cool down to a safe temperature. From there, you can inspect the motor for signs of wear and tear. If you see any, consider replacing the capacitor or lubricating the bearings to get it back in working condition. The blower motor is an essential component of your air conditioning and heating systems, so it’s important to keep it in good condition to ensure that your home is comfortable all year round.

Failed Thermostat

Thermostats are an important piece of equipment that help your AC and heater function properly. However, like any other electrical device they can break down from wear and tear or from a failure due to a variety of issues. It can be frustrating when your thermostat breaks down, especially in the middle of a hot summer or cold winter. But before you call for AC repair, there are a few things you should try. First, make sure the batteries are fresh. This is a simple task that takes less than a minute. Then, if the display on your thermostat is dark or blank, check the circuit breaker to see if it has been tripped. If it has, simply flipping it back on may fix your problem.

You should also clean your thermostat regularly to prevent dust and dirt from causing problems. To do this, turn off the power source and remove the cover. Then, using a brush or compressed air, clear any dust or debris from around and inside the thermostat. It is a good idea to perform this once a year. Another way to keep your thermostat from malfunctioning is to schedule regular furnace and air conditioner maintenance visits. During these visits, your certified technician will test the wiring connections and catch any signs of wear or damage to your thermostat that could lead to a failure.

Faulty wiring is a common cause of thermostat failure. If the wires connecting the thermostat to your HVAC system are loose, dirty, or disconnected, they won’t be able to communicate. Thermostats also tend to get worn out over time, especially if they are exposed to excessive wear or a lot of power surges.

A failed thermostat can cause your HVAC system to short-cycle, which can increase your energy bills and reduce your comfort. If your thermostat isn’t working the way it should, contact SuperTech and we will help you resolve the issue. We have a team of trained and experienced technicians that can diagnose the problem, offer technical solutions, and help you save money and stay comfortable all year round.

The Benefits of Hardwood Floor Refinishing

Hardwood Floor Refinishing Bergen County NJ add beauty and value to your home. They are also durable and easy to clean, but over time they can become worn and scratched. Regular refinishing helps protect and extend the life of your hardwood floors.

Hiring a professional flooring contractor is the best way to ensure that your hardwood floor refinishing project goes smoothly and with minimal damage to your existing hardwood.

Hardwood floors are durable and long-lasting, but they will eventually show signs of wear and tear. Refinishing hardwood floors is an easy way to revitalize them and restore them to their former beauty. On average, experts recommend refinishing hardwood floors every 7 to 10 years.

Refinishing involves sanding the entire floor to remove the top layer of finish and reveal the bare wood underneath. Then, the bare wood can be stained or sealed to enhance its look and protect it from further damage. Refinishing is a relatively quick process, but it takes some patience. It’s best to schedule it during a time when your household can be mostly out of the house or away on vacation, as the fumes from the polyurethane will be strong.

The first step in refinishing a hardwood floor is to determine what type of flooring you have. This is especially important if you’ve recently moved into a home and don’t know what kind of floors are in place. Solid hardwood floors are made of solid timber planks that are traditionally 3/4 of an inch thick. Engineered hardwood, on the other hand, is comprised of a real wood veneer that’s attached to an engineered plywood core. Most engineered wood can only be refinished one or two times in their lifetime before replacement becomes necessary.

Before starting the refinishing process, you’ll want to decide what sheen you’d like your finished product to have. There are several options available, from high-gloss to semi-gloss to satin or matte. Each sheen has its own benefits and drawbacks, with higher sheens offering a shiny, reflective finish that can hide small scratches and imperfections more easily and lower sheens providing a more natural, subdued appearance.

It’s a good idea to remove all furniture from the room being worked on, so you don’t run the risk of scratching it during refinishing. It’s also a good idea to close all windows and doors to keep dust contained in the work area. Finally, you’ll want to tape masking film over the baseboards to protect them from the sander and prevent dust from getting on them.

Staining a Hardwood Floor

When it comes to staining a hardwood floor, there are many different options available. Typically, a floor will be sanded down to bare wood before staining is applied. This will give the floor a richer color and help to protect it from damage and wear in the future.

When stains are applied to a hardwood floor, it is important to be careful and follow the manufacturer’s instructions. If you have any questions about the process, contact a professional flooring contractor for assistance. They will be able to guide you through the process and ensure that the results are beautiful.

Before you begin staining your floors, it is important to prepare the area by clearing the room of furniture and rugs. It is also a good idea to cover any vents and apply plastic sheeting to the baseboards to prevent dust and stain from leaking onto them.

Once the floor is sanded, it should be thoroughly cleaned with warm water and a mild detergent to remove any residual dirt and debris. It is important to use pure water for this step, as chlorine can react with the stain and cause blotching or streaking. Once the floors are cleaned, they should be allowed to dry completely before staining them.

Staining a hardwood floor is a delicate and time-consuming process. It is important to choose the right color and finish, and to ensure that the stain is evenly applied. Using a high-quality brush or sponge will help to achieve a smooth and even finish. When applying the stain, remember to run the sponge with the grain of the wood, rather than against it. It is also a good idea to wring the sponge before each application.

When the stain has been applied, it is important to let it dry before moving furniture back into the room. Depending on the type of stain used, it may take a few days for the finish to cure completely. During this period, it is best to avoid walking on the floors to prevent any dents or scratches.

Staining a hardwood floor is an excellent way to add warmth and character to your home. It is a time-consuming and labor-intensive project, but the results are well worth it. With the proper care and maintenance, your hardwood floors will last for years to come.

Sealing a Hardwood Floor

Hardwood flooring has a natural beauty that adds an air of elegance to any home. Because of this, people want to keep it looking its best for as long as possible. One way to do this is by sealing the hardwood floor. Sealing helps prevent stains, scratches and other damage to the wood. It also protects the hardwood from moisture and fungus that could cause it to warp or swell.

Before you can seal your hardwood floors, it is important to make sure they are free of dust, dirt and debris. This can compromise the smoothness of the floors and may interfere with the staining process. Ideally, the floors should be swept or vacuumed before you start working on them.

It is also important to make sure the room you are using to work on the floors is well-ventilated. Many of the products used to refinish hardwood floors will emit harmful vapors that can be dangerous to breathe. Having a window or door open and wearing personal protective equipment will help to ensure that your breathing is not compromised while you are refinishing the hardwood floors.

Depending on the type of finish your hardwood floors have, you will need to decide between refinishing them or resealing them. Refinishing is more involved and time-consuming, but it is the best option for severely damaged or worn floors. Resealing, on the other hand, is a quicker and simpler option that will still allow your floors to look their best.

When resealing your hardwood floors, it is important to use a polyurethane-based product. This will provide the highest level of protection and is most resistant to stains. Polyurethane also dries quickly and is less likely to leave behind an unpleasant chemical smell.

If you are resealing your hardwood floors after refinishing them, it is important to apply multiple coats of the polyurethane. Each coat should be allowed to dry for an hour before applying the next one. This will help to ensure that the floors are protected from water damage and that they have a beautiful shine.

Cleaning a Hardwood Floor

Cleaning a hardwood floor is a vital step in maintaining their beauty and durability. Keeping the floors free of dirt, grime and grit prevents scratching and water damage that dulls or darkens the finish.

Sweep or vacuum the floors regularly to remove surface dirt, debris and dust that can scratch or discolor the wood. A vacuum cleaner with a soft brush attachment or a dust-mop attachment is ideal for hardwood floors. Avoid using a cyclone or water-based vacuum machine because they can clog and break, sucking up bits of sawdust that could scratch the floor.

A wood-staining product can also restore the beauty of scuffed or scratched hardwood. A commercial scratch remover, stain marker or wax stick is usually all that’s needed to repair shallow or superficial scuff marks.

Staining is a popular technique used to enhance wood floors. It can create a wide range of colors and tones that complement various design styles. If you decide to stain your floors, be sure to use a low-VOC product that’s formulated for use on hardwood floors.

Keep in mind that stained hardwood can absorb more grease and oil than untreated or prefinished wood surfaces. Therefore, it’s important to wipe up spills as soon as they occur and to clean stains with a damp cloth or mop.

It’s also a good idea to use doormats inside and outside the front and back doors, and to add area rugs to high-traffic areas to catch loose dirt and grime that might scratch or stain the floor. Consider adding felt pads to the bottom of furniture legs, as well.

Paint splatters and drips are another common problem that can mar beautiful hardwood flooring. Water-based paint splatters can often be removed with a cloth soaked in warm water, but oil-based paint requires the use of an environmentally friendly solvent.

Hiring a professional hardwood floor contractor to refinish your floors is the best way to ensure that the process is executed with precision and efficiency, resulting in a flawless, long-lasting finish. They also have access to high-quality refinishing tools and materials that aren’t available to the average homeowner. They adhere to industry standards and best practices, which guarantees that your floor will look its very best.

How Replacement Windows Can Enhance Your Home’s Curb Appeal

New windows help reduce energy costs, block out excessive street noise, and offer many other advantages. They can also enhance your home’s curb appeal and add to its overall value.

Replacement Windows

Foggy windows can be caused by condensation between the glass. This is a sign that the seal has failed, leaving your window vulnerable to moisture and heat loss. For professional help, contact Replacement Windows Sharon now!

A new window’s ability to prevent drafts, reduce moisture in the home and cut energy costs is a big selling point for a homeowner. In fact, if you choose top-performing energy-efficient windows, you may be able to get a return on your investment when it comes time to sell your home.

Energy-efficient replacement windows minimize heat transfer from the interior to exterior and vice versa, reducing energy consumption. They also help to keep your home cool, comfortable and dry. Additionally, many energy-efficient windows provide sound insulation and block harmful UV rays that can cause your furniture or carpeting to fade over time.

If you want to maximize the benefits of your replacement windows, select windows with wood or fiberglass frames rather than aluminum. Aluminum is a good conductor of heat and can cause your new windows to lose energy efficiency over time. Wood and fiberglass are poor conductors of heat, allowing your windows to retain their insulating properties longer.

Today’s replacement windows come with a variety of options for color, hardware finishes and styles. This means you can find the right aesthetic to match your style and complement your home’s architecture. This is important when it comes to resale, as potential buyers will want the look of your home to remain consistent.

Energy efficient features that are included with some replacement windows include double- or triple-pane glass with argon gas and low-e coatings. The low-e coating reflects various solar waves, including long-wave infrared energy (or heat) to help keep your home more comfortable. Combined with premium insulation and double or triple-pane windows, these features can significantly increase your home’s energy efficiency.

In general, double hung and casement windows are more energy efficient than sliders. Double hung windows open and close more easily, while sliding doors have multiple joints that can allow air to leak in. Casements, on the other hand, have a tight seal and can be opened and closed with a crank handle.

Curb Appeal

New windows give your home a fresh, polished look. They’ll help to keep cold air out during the winter and cool air in during the summer while also reducing your energy costs. And the right frames and trim can align with your architectural style for a cohesive aesthetic that boosts curb appeal.

Choosing the right frame material for your replacement windows is an important decision that will impact how your home looks from the street. Composite frames, for example, offer a classic appearance but are highly durable and low maintenance. Wood frames, on the other hand, are available in a wide variety of species and finishes for a custom-looking window.

You can also use your replacement windows to complement other aspects of your property’s exterior, such as the front door, awnings, or walkways. A well-placed plant or flower can add a splash of color that will catch the eye of passersby. In addition, adding a welcome sign or a doormat will make your home feel more inviting and increase the overall curb appeal of your building.

As a general rule, symmetry is more pleasing to the eye than asymmetry. That’s why it’s often a good idea to replace your windows with similar varieties to maintain a symmetrical look to your exterior. Likewise, you may want to consider bay windows or other specialty varieties that will give your building a unique and attractive design.

Changing the size, shape, and quantity of your windows can make a big difference when it comes to curb appeal. For example, if your current windows are small and poorly-positioned, you might want to consider replacing them with larger versions that will open up more of the wall space and create a focal point.

Another easy way to improve your home’s curb appeal is by painting your window trim and frames. You’ll be able to match your existing siding or choose a completely different color that will make your home stand out from the rest. The options are endless, and the results can be spectacular.

Low Maintenance

Many older windows require a great deal of maintenance to keep clean and functioning properly. This can be in the form of regular cleaning to remove dirt and grime, repairing damage or replacing components that have worn out over time. Windows that don’t function at their best can increase energy bills, reduce comfort levels and add to the overall cost of homeownership.

Modern replacement windows are designed with low maintenance in mind. Many offer features such as between-the-glass blinds that reduce dusting and sash that tilt in to allow for easy cleaning of hard to reach areas. Some also come with an energy-efficient coating that cuts air infiltration and UV light penetration, cutting down on your energy costs while maintaining optimal functionality.

Today’s replacement windows are available in a wide range of styles, appearances and materials to complement any home. Options like specialty woods, hardware finishes and 19 clad colors let you choose the windows that perfectly suit your lifestyle and taste. This allows you to enjoy the beauty and benefits of your new windows for years to come.

The best way to maintain your replacement windows is to inspect them regularly for signs of wear and tear. This can catch minor problems before they become a major problem and prevent the need for costly repairs. Checking the frames and seals for moisture buildup is particularly important as water damage can cause rot, mold and other problems that need to be addressed promptly.

It’s also a good idea to inspect your windows for proper fit. Older windows can lose their proper fit over time and this can make them drafty or difficult to open or close. Identifying any loose or uneven frames will help you to schedule a window replacement project at the right time to get the most benefit from your investment.

If you’re ready to start enjoying the benefits of your new replacement windows, be sure to speak with a qualified installer about scheduling your project. It’s a good idea to plan ahead, as the pandemic has caused supply-chain issues that may extend the amount of time it takes to receive your custom windows. Typically, you should expect to wait 2 to 3 months from the date of contract signing until your replacement windows are installed.

Easy Installation

When a homeowner installs new windows in their home, they can often choose from many different styles, types and sizes. Whether that is in order to match the look of their other windows or because they have a particular style in mind for their new addition, it’s important that homeowners understand what it is they are getting themselves into when making this type of investment.

The main difference between replacement windows and new construction windows is that new construction windows are installed during the building process and are not meant to replace existing window openings. These windows are typically used in new construction projects or when adding an expansion to your current home. When this is the case, it is important that you have your contractor explain to you what kind of window you will be installing in order for you to make the proper choice.

However, most of the time when a homeowner is looking to upgrade their windows, they will be using replacement windows. These windows are designed to fit into existing window frames and not require the removal of any exterior materials or wall studs. This makes them the best option for homeowners who are looking to add a little something extra to their home without going through any major construction.

One of the biggest benefits of replacement windows is that they are easy to install by a professional and do not require any significant framing work. This means that it is a much less disruptive process than putting in new windows and can usually be completed within a few days. It also doesn’t require any additional insulation or drywall, so it is an extremely cost-effective way to update your home’s appearance and energy efficiency.

As the winter approaches, it is important that you start thinking about how your home’s windows are performing. It is very common for older windows to begin leaking, leaving gaps and allowing ice, water and cold air to seep into your home. This can cause your heating and cooling systems to run longer and can lead to rotting, mildew and mold in the area around your windows. When this happens, replacing them with quality windows is a smart move to protect your home’s investment and keep it in great shape.